【Common】Account Registration
①Click on the login link.

②Before registering an account, please make sure to read the terms of service. If you do not agree to the terms of service, please do not proceed with the account registration.
③Enter the email address and password for the account you wish to register.
④Click on the signup button.
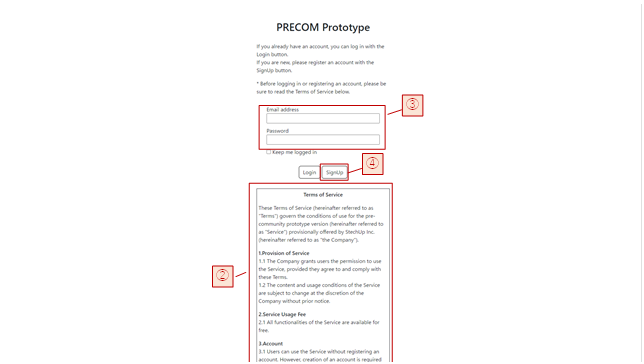
⑤If the home screen appears, the account registration has been successfully completed.
【Common】Login
①Click on the login link.

②Before logging in, please make sure to read the terms of service. If you do not agree to the terms of service, please do not proceed with logging in.
③Enter the email address and password for the account you wish to log in with.
④Click on the login button.
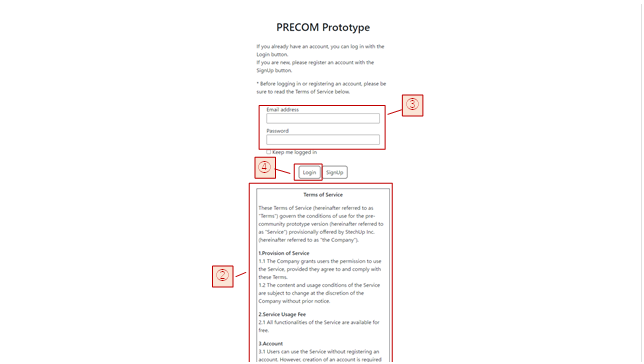
⑤If the home screen appears, the login was successful.
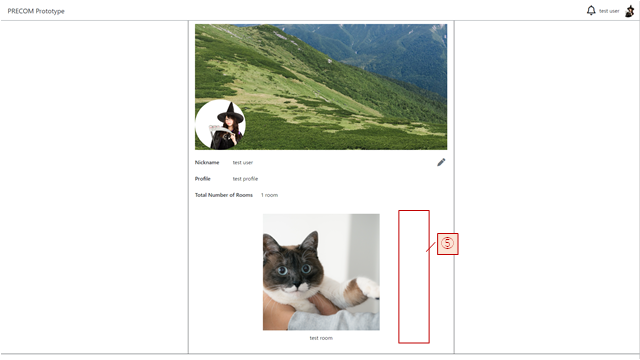
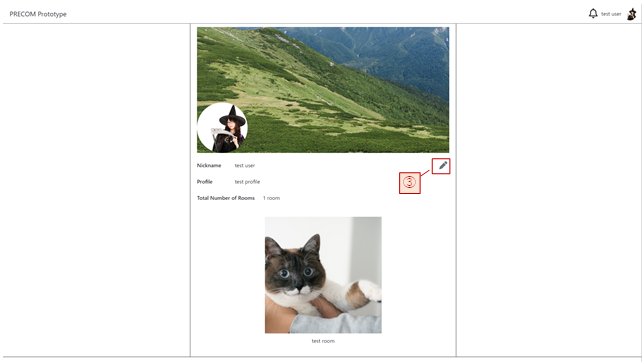
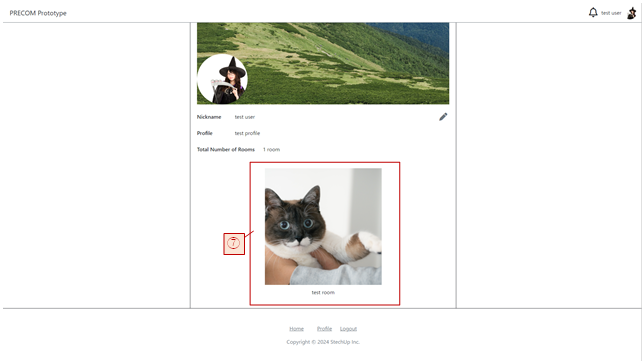
【Common】User Information Editing
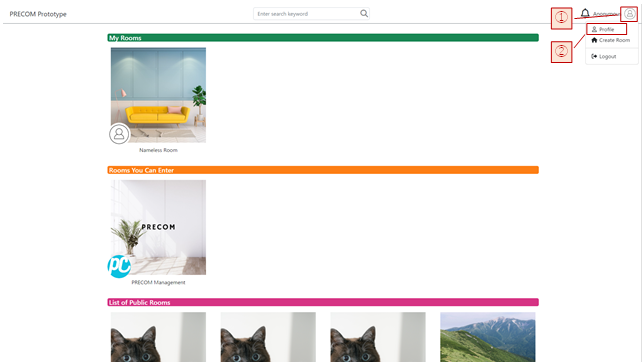
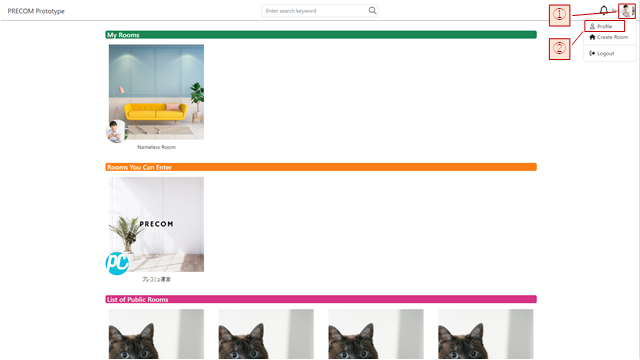
①Select the user icon.
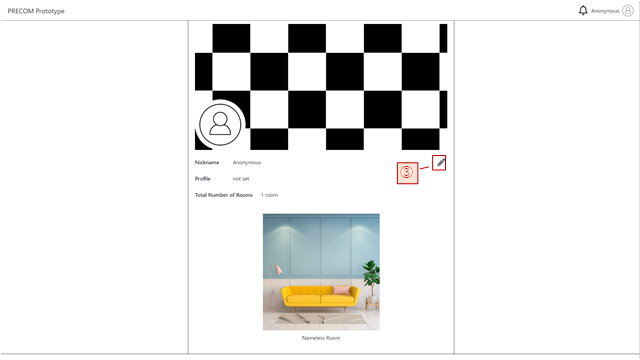
②Press the profile.
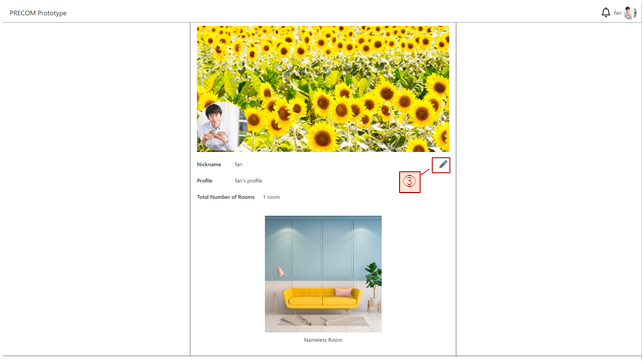
③Press the edit icon.
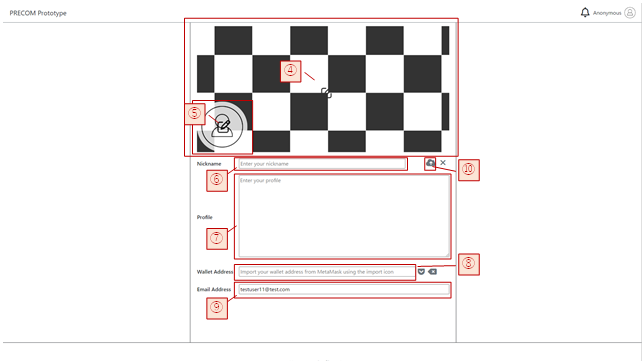
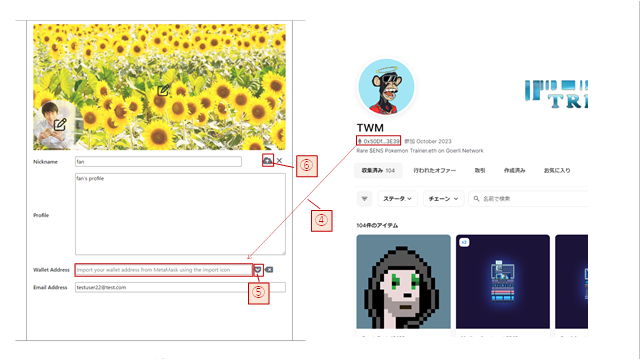
④You can change the user banner by selecting the user banner option.
⑤You can change the user icon by selecting the user icon option.
⑥You can change the nickname by entering a new one.
⑦You can change the profile information by entering new details.
⑧For registering a wallet address, refer to the “【Artist】Link NFTs to the Room to Enable Entry” and “【Fan】Enter Artist’s Room” section.
⑨You can change the email address by entering a new one.
⑩User information will be saved upon selecting the upload icon.
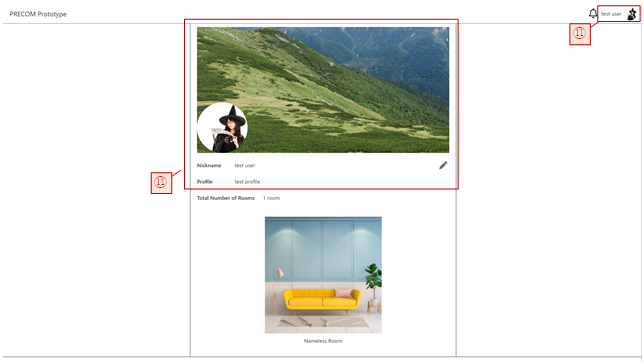
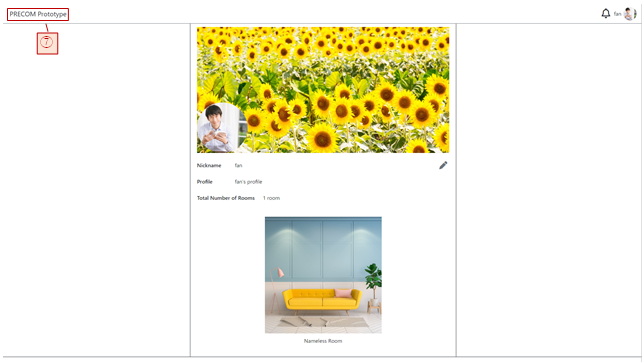
⑪User information has been updated.
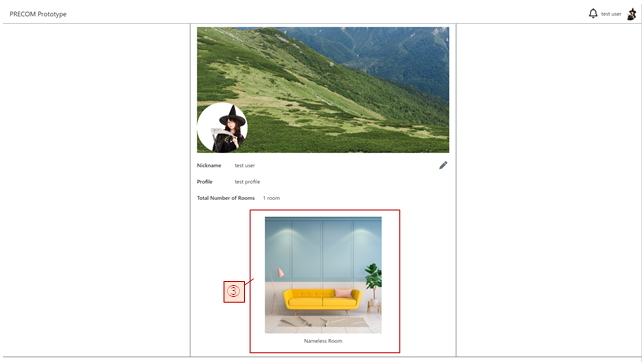
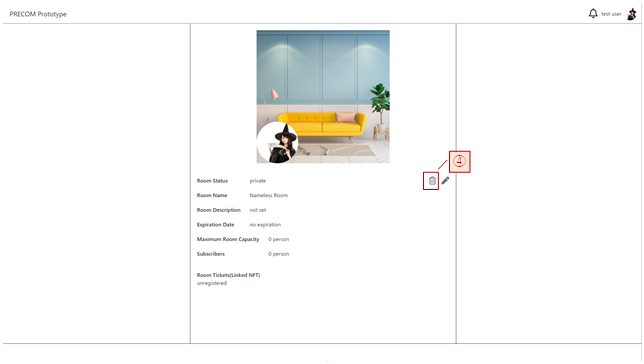
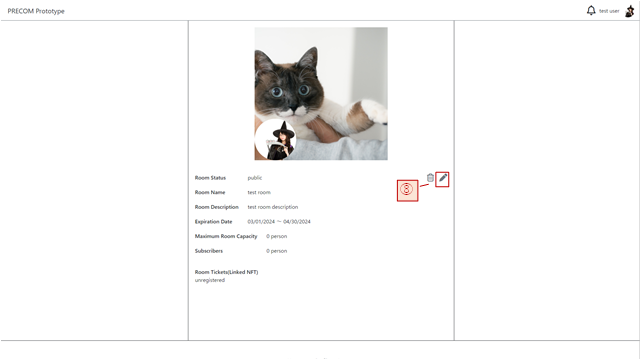
【Artist】Edit Room Information
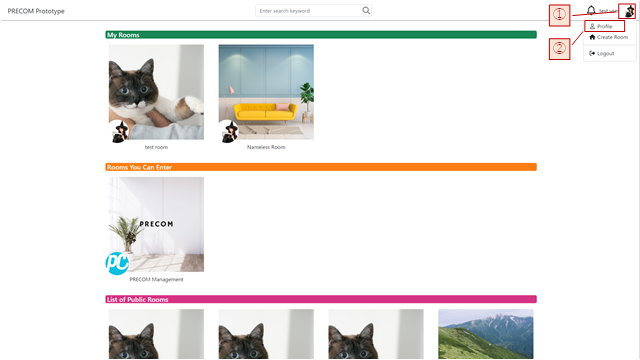
①Select the user icon.
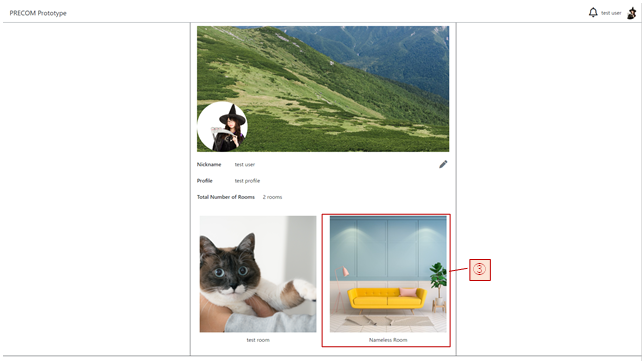
②Press the profile.

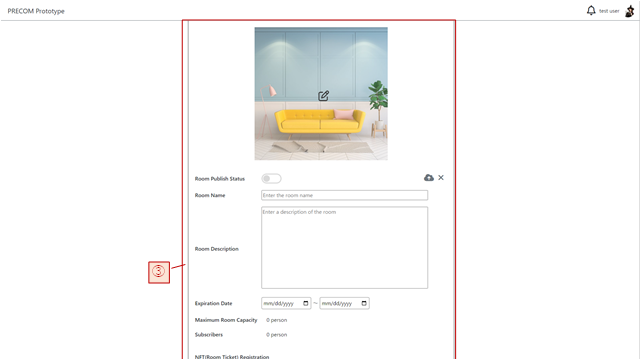
③Select the room you wish to edit.
④Press the edit icon.
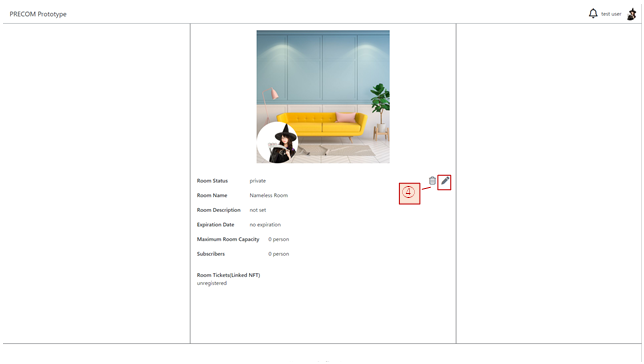
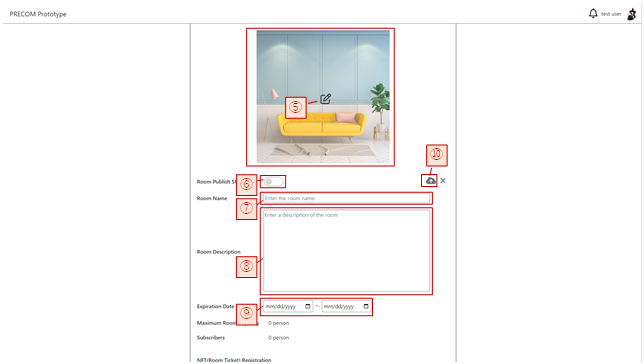
⑤You can change the room image by selecting the room image option.
⑥You can change the room’s public status by toggling the room’s public status switch. When the room’s public status is turned on, general users can access this room from the home screen.
⑦You can change the room name by entering a new one.
⑧You can change the room description by entering new details.
⑨You can set an expiration date for the room. Setting an expiration date will restrict chatting on days other than those within the validity period.
⑩User information will be saved upon selecting the upload icon.
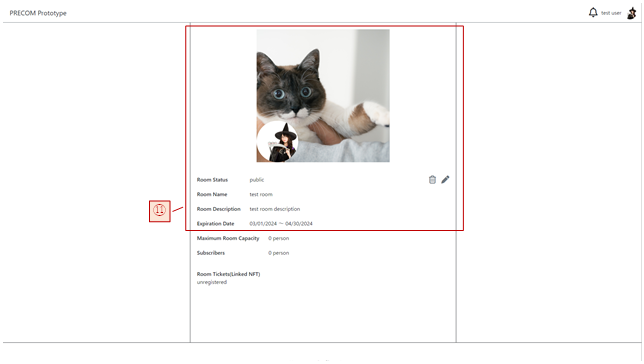
⑪Room information has been updated.
【Artist】Create New Room
①Select the user icon.
②Press the create room.
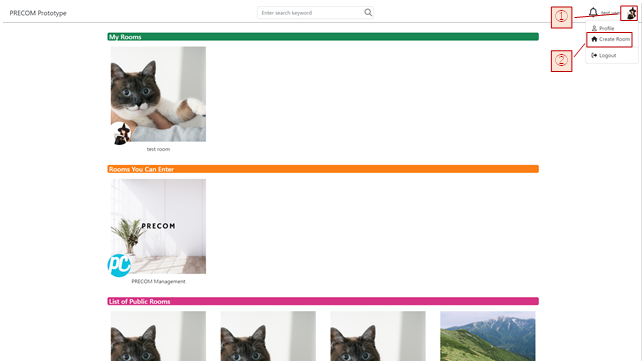
③A new room will be created.
【Artist】Delete Room
①Select the user icon.
②Press the profile.
③Select the room you wish to delete.
④Select the delete icon.
⑤The room has been deleted. Note that once deleted, it cannot be recovered.
【Artist】Link NFTs to the Room to Enable Entry
Prerequisite: You are logged into OpenSea and have already listed NFTs on OpenSea.
①Select the user icon.
②Press the profile.

③Press the edit icon.
④Copy your address from your OpenSea account page and paste it into the wallet address field.
⑤Alternatively, you can link your MetaMask wallet by using the import icon.
⑥User information will be saved upon selecting the upload icon.
⑦Select the room you want to register NFTs for.
⑧Press the edit icon.
⑨Copy the URL from your OpenSea NFT sales page starting from the chain, and paste it into the NFT address field. The images shown are from OpenSea’s testnet, but the same operations are possible on the production version of OpenSea.
⑩Select the add icon to register the NFT.
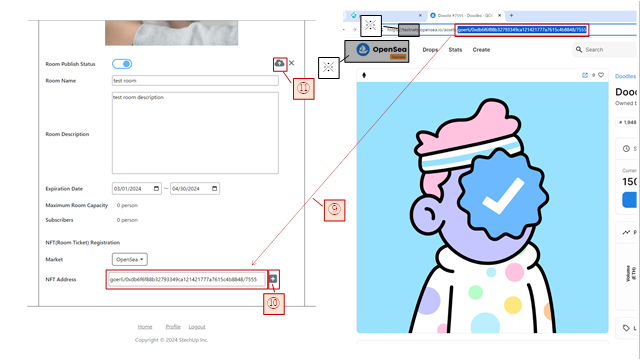
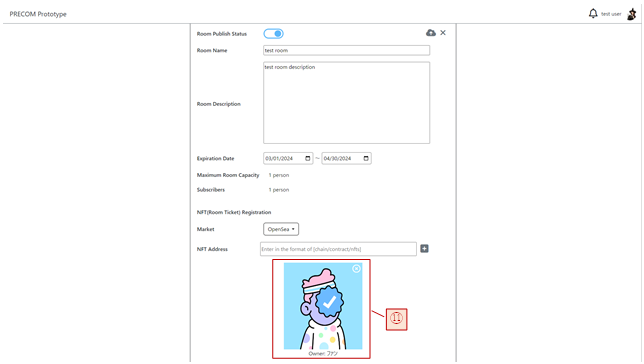
⑪The NFT has been registered. When you select the add icon without selecting the room’s upload icon, the NFT will be registered to the room.
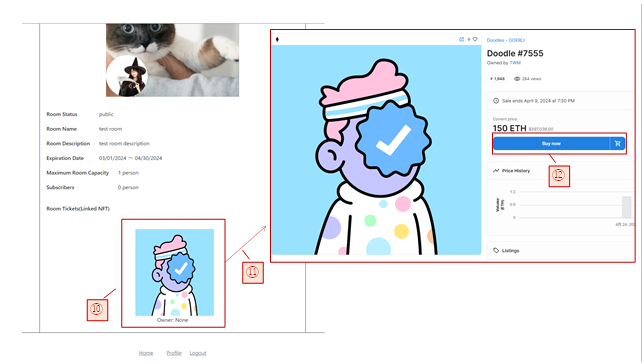
If a user who owns the NFT linked at the time of registration exists as a pre-committed user, their “Nickname” will be displayed. If the user does not exist, “None” will be displayed.
The display of the “Nickname” of the corresponding user means that the matching of room tickets has been made within the Pre-commie application. Therefore, it is possible to chat or perform live chats with users whose names are displayed as owners.
Note that the matching confirmation between NFT listers/registrants and NFT list/owners is done overnight Japan time. Therefore, even if “None” is displayed at the time of NFT registration, if the pre-committed user purchases the NFT, the “Nickname” of the corresponding user will be displayed the next morning.
【Fan】Enter Artist’s Room
Prerequisite: You are logged into OpenSea.
①Select the user icon.
②Press the profile.
③Press the edit icon.
④Copy your address from your OpenSea account page and paste it into the wallet address field.
⑤Alternatively, you can link your MetaMask wallet by using the import icon.
⑥User information will be saved upon selecting the upload icon.
⑦Return to the home screen.
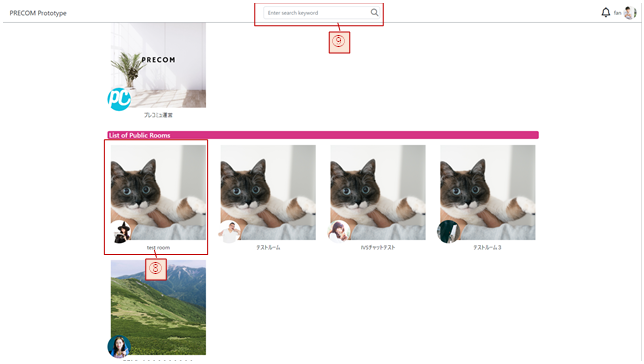
⑧From the public room list, select the artist’s room you want to enter.
⑨If the desired room is not listed, you can search for it using the search box.
⑩Select the NFT image registered in the artist’s room.
⑪Go to OpenSea’s NFT page.
⑫Purchase the NFT.
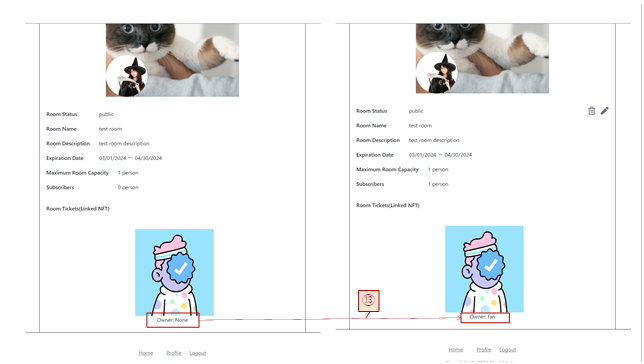
⑬The artist will re-register the NFT, or the owner will be updated the following day, after Japan’s nighttime.
If a user who owns the NFT linked at the time of registration exists as a pre-committed user, their “Nickname” will be displayed. If the user does not exist, “None” will be displayed.
The display of the “Nickname” of the corresponding user means that the matching of room tickets has been made within the Pre-commie application. Therefore, it is possible to chat or perform live chats with users whose names are displayed as owners.
Note that the matching confirmation between NFT listers/registrants and NFT list/owners is done overnight Japan time. Therefore, even if “None” is displayed at the time of NFT registration, if the pre-committed user purchases the NFT, the “Nickname” of the corresponding user will be displayed the next morning.
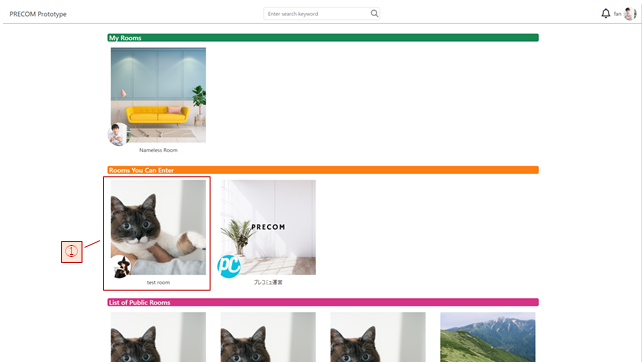
⑭Once entry is possible, it will be displayed in the available rooms on the home screen.

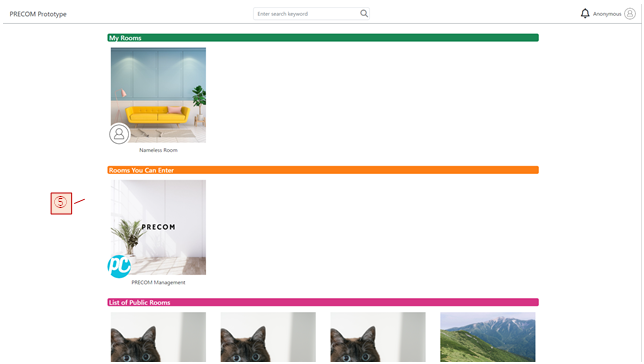
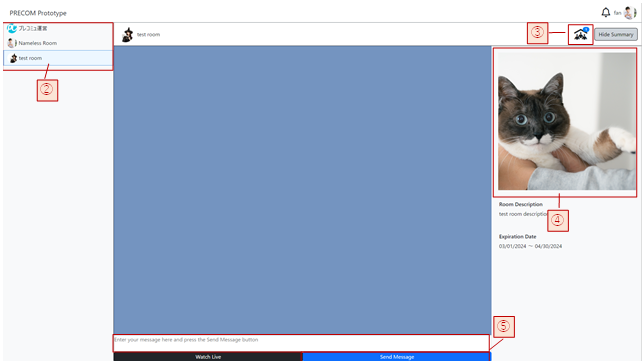
【Common】Chat
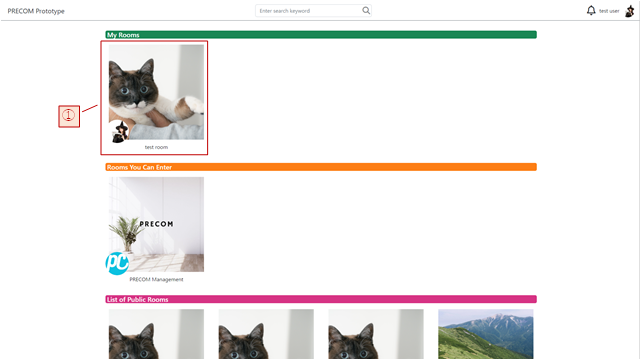
①Select the room displayed in “My Rooms” or “Rooms You Can Enter” that you want to enter.
②Upon selecting the room, the chat for the selected room will be displayed.
③Selecting the room icon allows you to view the list of members who can enter.
④Selecting the room image allows you to navigate to the room information screen of the selected room.
⑤Enter the message you want to send in the message box at the bottom of the screen, then press the send button to send the message.
【Artist】Live Streaming
①Select the room displayed in “My Rooms” where you want to start live streaming.
②Press the live start button.
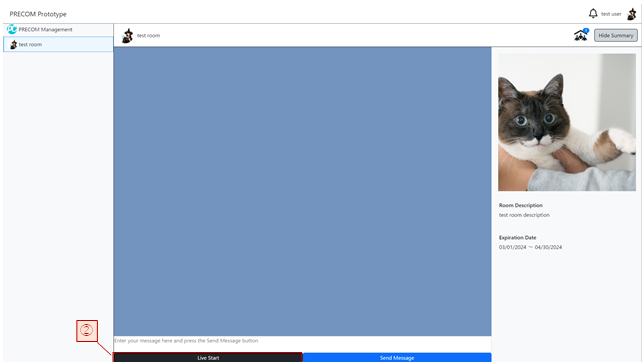
③Set up your camera, microphone, and resolution, then press the start streaming button to start the live stream. Press the stop streaming button to end the live stream.
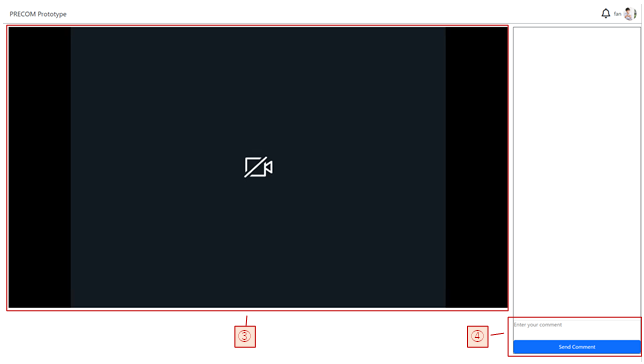
④Enter a comment and click the Send Comment button to send the comment to the live participants.

【Fan】Live Viewing
①Select the room where the live streaming is being displayed on the “Rooms You Can Enter”.

②Press the watch live button.
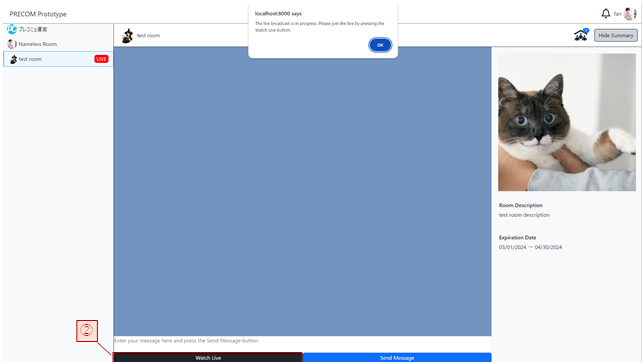
③Live viewing is possible with the live player.
④Enter a comment and click the Send Comment button to send the comment to the live participants.